How do I set up my Squire microphone?
Written By Ignace Maes
Last updated 2 months ago
Learn how to connect the Squire microphone and select the right settings in the consultation screen for the best recording quality (great impact on generated report). More information about the Squire microphone can be found here.
1. Connecting the microphone
The Squire microphone is a "plug-and-play" device.
Connect the cable to a free USB-A or USB-C port on your computer.
Check the Squire logo on the microphone:
Green light: The microphone is ready for use.
Red light: The microphone is on 'mute' (press the button to activate).
2. Selecting the right microphone in Squire
Once the microphone is connected, you need to activate it within the Squire app.
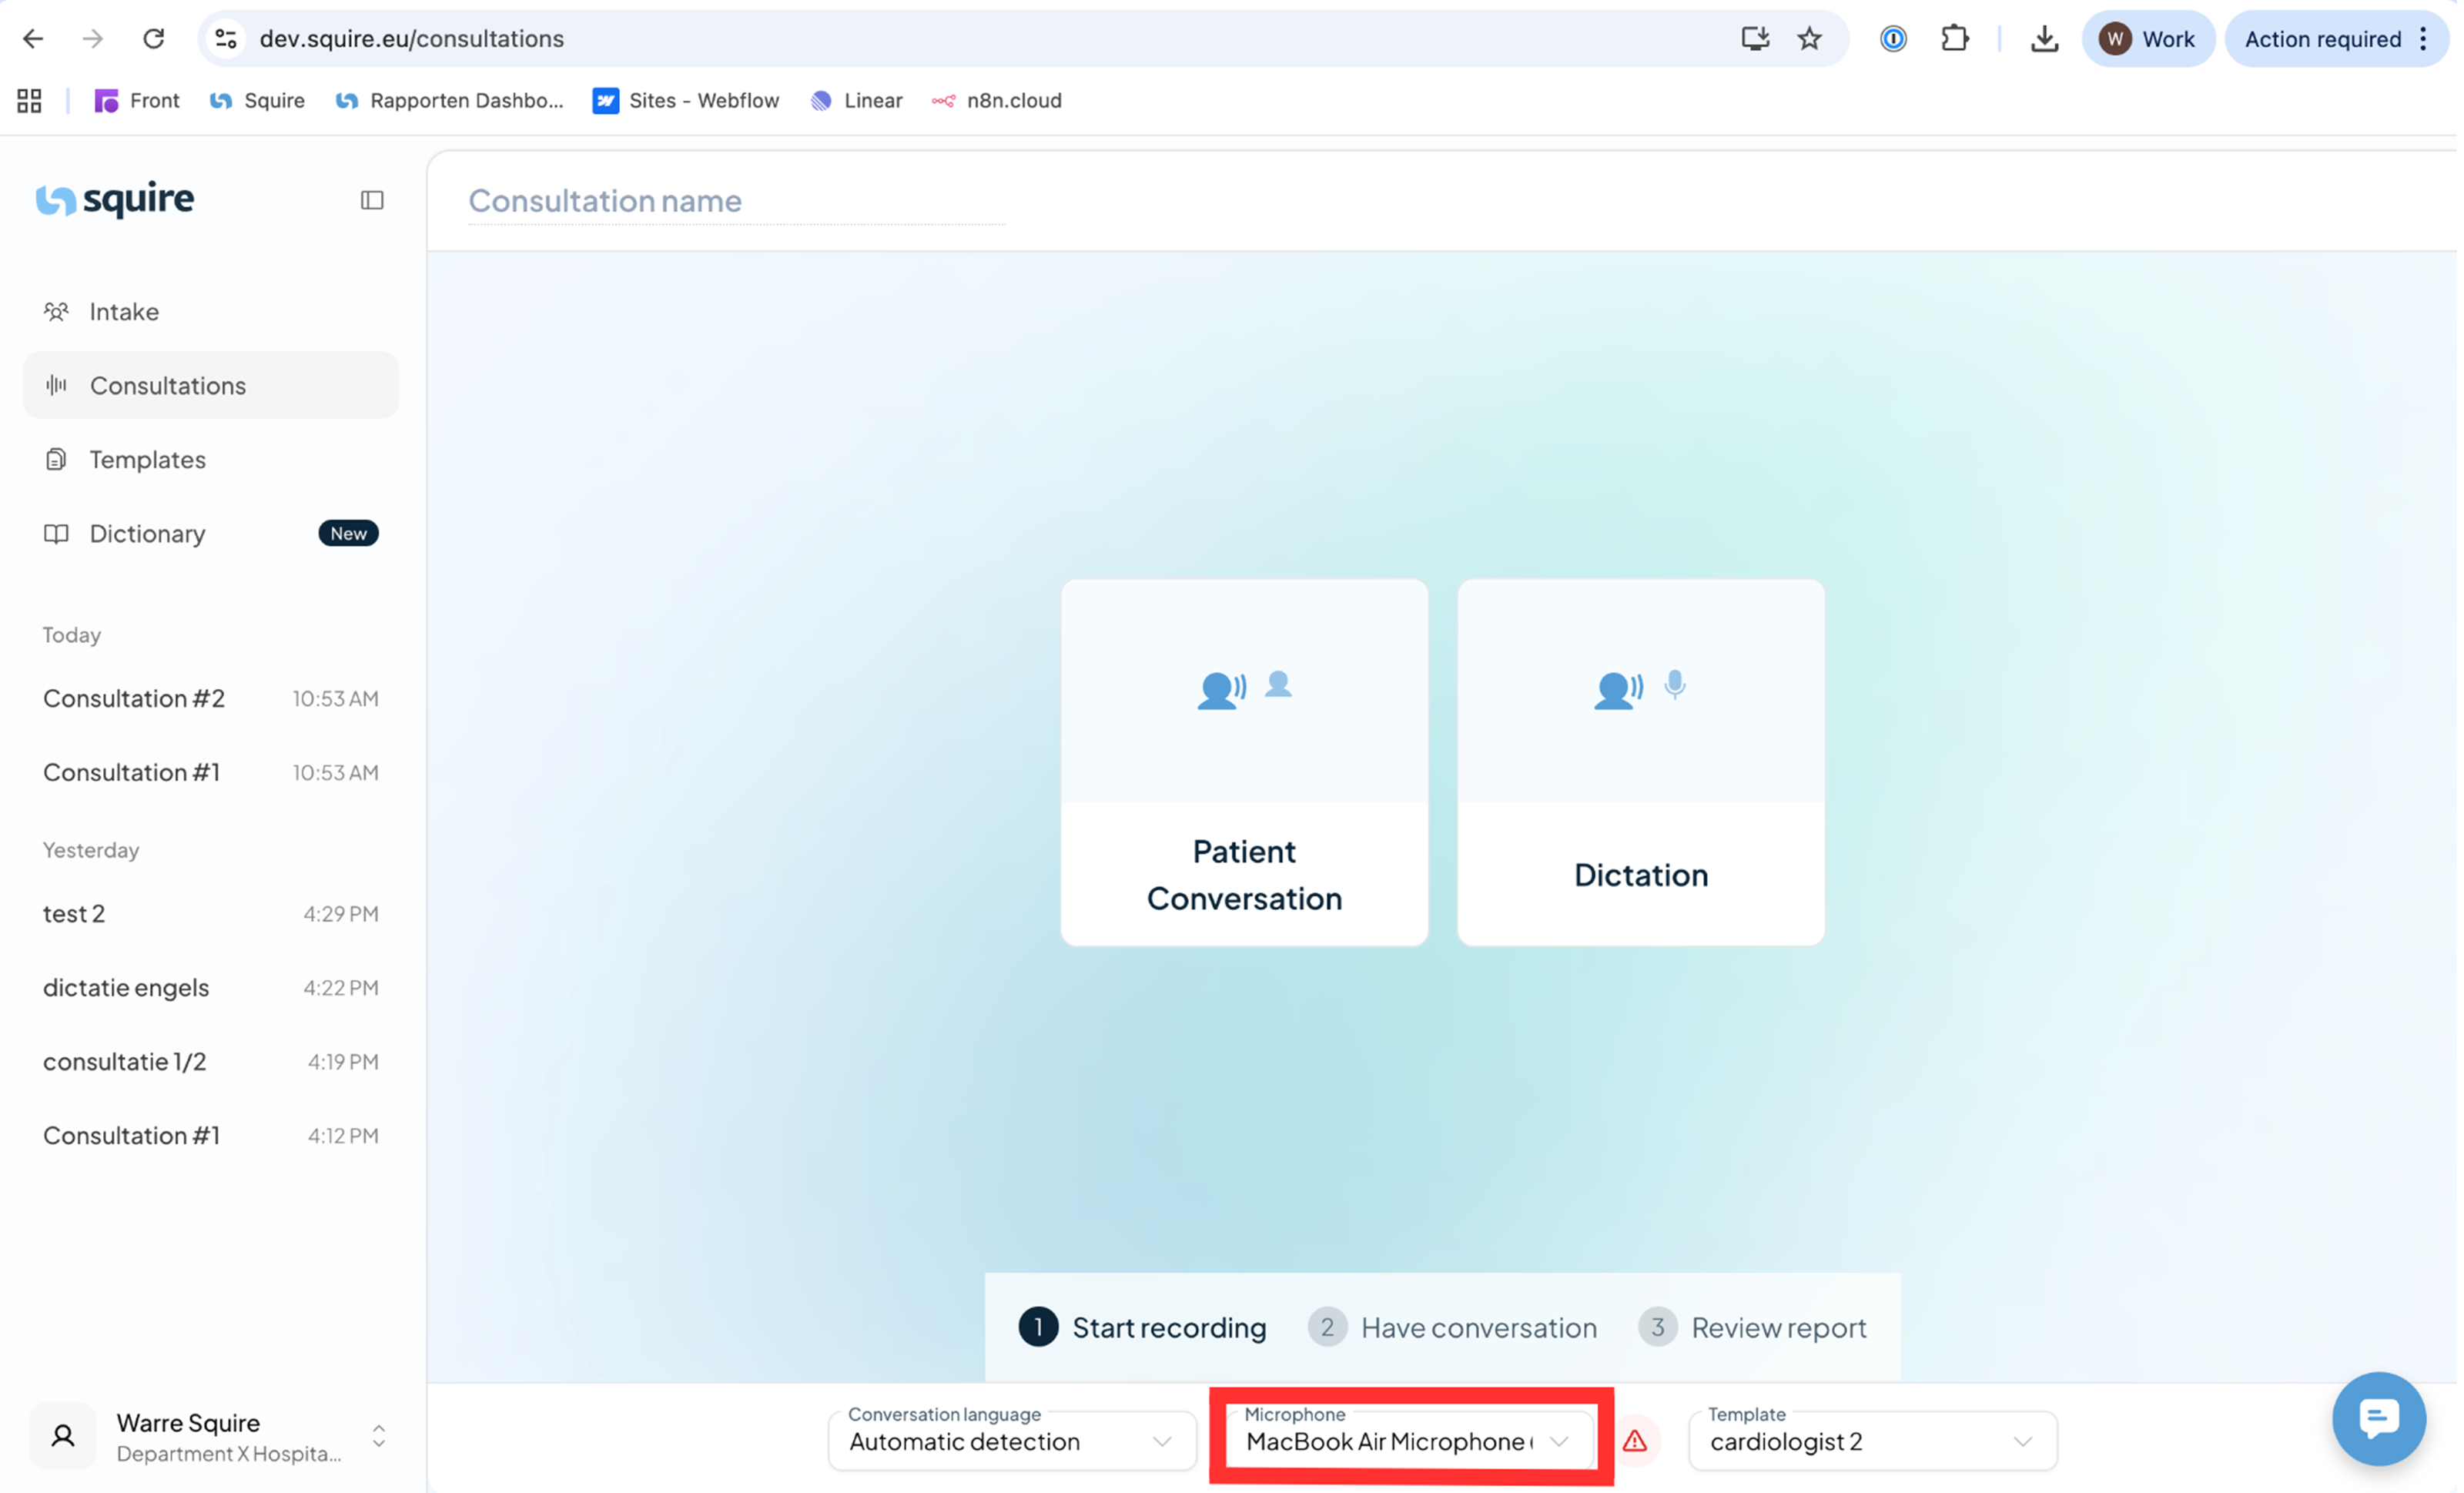
Open the Consultation screen.
Click on the Microphone menu at the bottom.
Select the "Squire Microphone" option from the list.
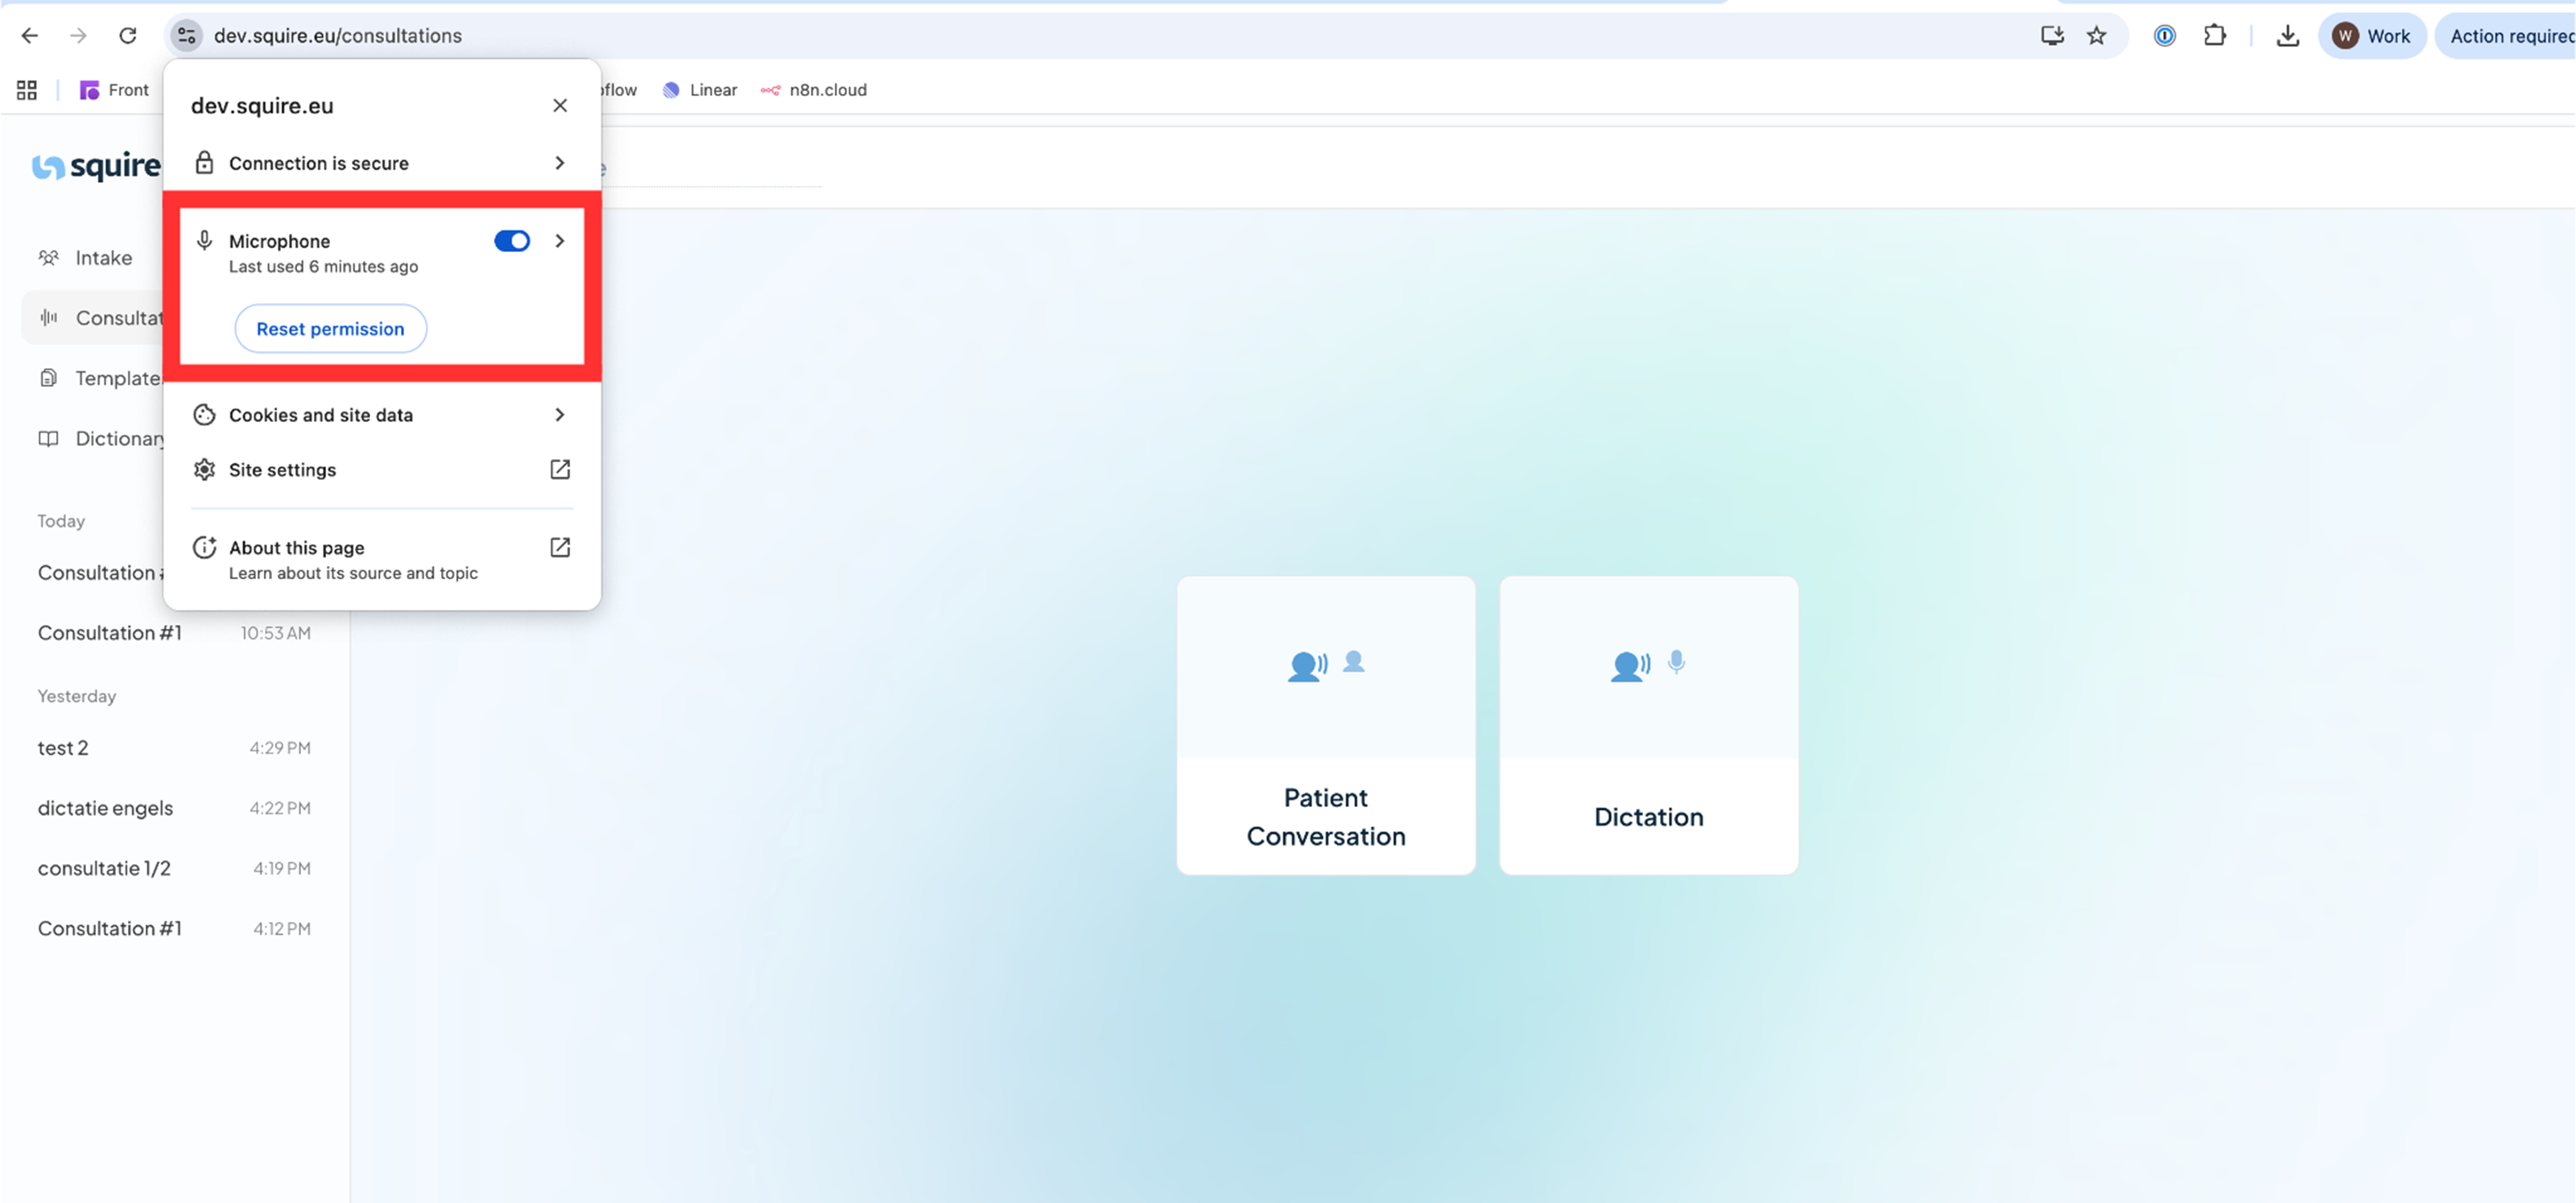
If there is no microphone to select, it may be that you first need to give Squire permission to use the microphone.
Click on the icon to the left of the URL in the Chrome browser
Turn on the permission by clicking on the switch to the right of "Microphone"